> ## Documentation Index
> Fetch the complete documentation index at: https://docs.reelevant.com/llms.txt
> Use this file to discover all available pages before exploring further.
# Workflow Settings
> Configure branch categories, variable profiles, and JSON templates for your workflows
## Accessing Workflow Settings
Open the **Workflows** application from the sidebar, then navigate to the **Settings** page. The settings page has three tabs:
* **Branch categories** — Manage your branch category hierarchy.
* **Variable profiles** — Configure reusable URL parameter templates.
* **JSON Templates** — Define and manage JSON output templates for headless integrations.
***
## Branch Categories
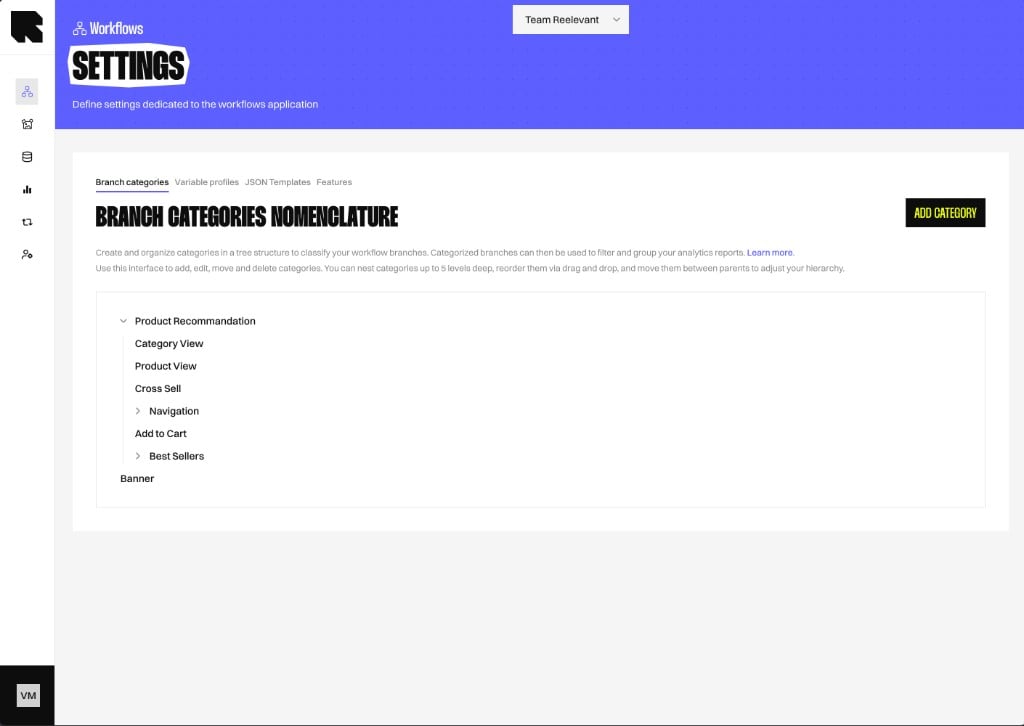 The branch categories section is a hierarchical tree of categories used to **qualify branches** across all your workflows. It provides a shared vocabulary for your team and powers analytics filtering by category.
### Viewing the Category Tree
The **Branch categories** tab displays your category tree as an interactive, expandable hierarchy. Each category shows:
* **Name** — The category label.
* **Level** — Its depth in the tree.
* **Children** — Sub-categories nested underneath.
### Creating a Category
Click the **Add** button to open the category creation drawer.
* **Name** — A descriptive name for the category (e.g., "Product Recommendation").
* **Parent** — Optionally select a parent category to nest this one underneath.
Click **Save** to add the category to the tree.
### Editing a Category
Click on an existing category in the tree to open the edit drawer. You can update the name or move it under a different parent.
### Deleting a Category
Deleting a category removes it from all workflows where it is used. Branches that referenced the deleted category will lose their qualification.
1. Select the category in the tree.
2. Click the **Delete** button.
3. Confirm the deletion in the confirmation modal.
### Best Practices
* **Design for analytics** — Structure your category tree around the dimensions you want to analyze (e.g., by strategy type, by content category, by audience segment).
* **Keep it flat enough** — A deep tree is harder to navigate. Aim for 2-3 levels at most.
* **Name clearly** — Use descriptive names that any team member can understand without context.
***
## Variable Profiles
The branch categories section is a hierarchical tree of categories used to **qualify branches** across all your workflows. It provides a shared vocabulary for your team and powers analytics filtering by category.
### Viewing the Category Tree
The **Branch categories** tab displays your category tree as an interactive, expandable hierarchy. Each category shows:
* **Name** — The category label.
* **Level** — Its depth in the tree.
* **Children** — Sub-categories nested underneath.
### Creating a Category
Click the **Add** button to open the category creation drawer.
* **Name** — A descriptive name for the category (e.g., "Product Recommendation").
* **Parent** — Optionally select a parent category to nest this one underneath.
Click **Save** to add the category to the tree.
### Editing a Category
Click on an existing category in the tree to open the edit drawer. You can update the name or move it under a different parent.
### Deleting a Category
Deleting a category removes it from all workflows where it is used. Branches that referenced the deleted category will lose their qualification.
1. Select the category in the tree.
2. Click the **Delete** button.
3. Confirm the deletion in the confirmation modal.
### Best Practices
* **Design for analytics** — Structure your category tree around the dimensions you want to analyze (e.g., by strategy type, by content category, by audience segment).
* **Keep it flat enough** — A deep tree is harder to navigate. Aim for 2-3 levels at most.
* **Name clearly** — Use descriptive names that any team member can understand without context.
***
## Variable Profiles
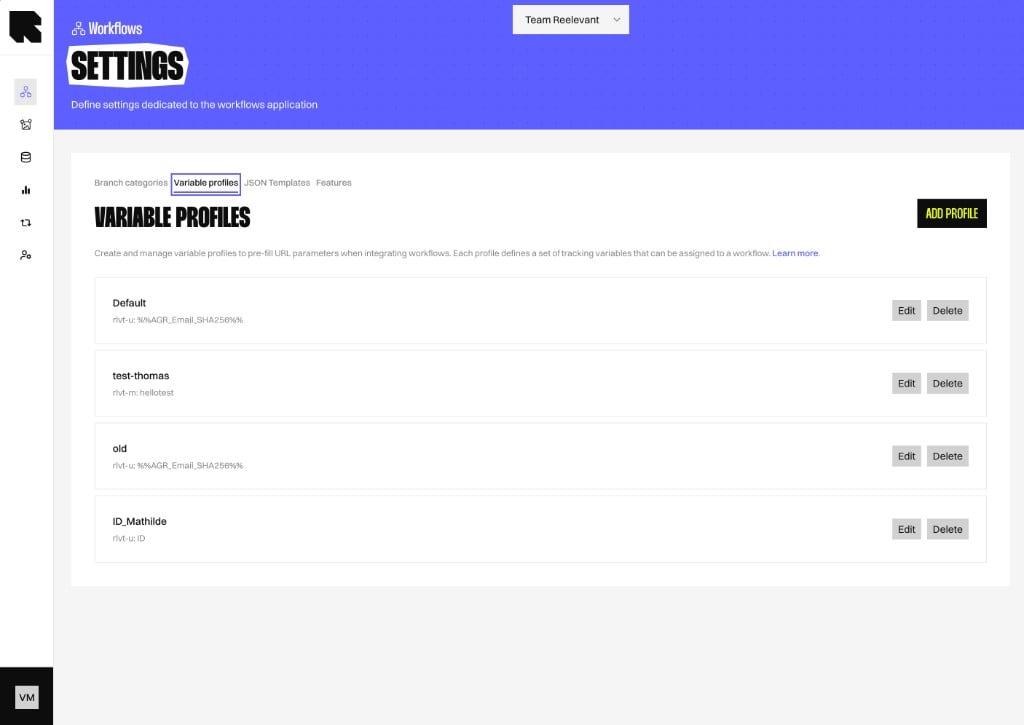 Variable profiles are **reusable templates of URL parameters** that get applied during workflow [integration](/product-guide/workflows/integration). They save time when you have a standard set of tracking parameters (UTM tags, user identifiers, etc.) used across multiple workflows.
### Viewing Profiles
The variable profiles tab displays a table of all configured profiles with their names and parameters.
### Creating a Variable Profile
Click the **Add** button to open the variable profile creation drawer.
* **Name** — A descriptive name (e.g., "Standard Email Tracking", "Web Campaign UTM").
* **Parameters** — Define the URL parameters included in this profile:
* **Parameter name** — The URL query parameter key (e.g., `utm_source`, `user_id`).
* **Default value** — An optional default value for the parameter.
Click **Save** to create the profile. It will be available for selection during workflow integration.
### Editing a Profile
Click on a profile in the table to open the edit drawer. Update the name or parameters as needed.
### Deleting a Profile
1. Click the **Delete** action on the profile row.
2. Confirm the deletion.
Deleting a variable profile does not affect already-deployed workflow integrations. However, future integrations will no longer be able to select this profile.
### Tips
* Create separate profiles for different channels (email vs. web) since they typically use different tracking parameters.
* Standardize parameter names across your team to ensure consistent analytics data.
* Variable profiles complement URL Parameter nodes in workflows — the profile provides the parameter structure, and the URL Parameter node reads the value at runtime.
***
## JSON Templates
Variable profiles are **reusable templates of URL parameters** that get applied during workflow [integration](/product-guide/workflows/integration). They save time when you have a standard set of tracking parameters (UTM tags, user identifiers, etc.) used across multiple workflows.
### Viewing Profiles
The variable profiles tab displays a table of all configured profiles with their names and parameters.
### Creating a Variable Profile
Click the **Add** button to open the variable profile creation drawer.
* **Name** — A descriptive name (e.g., "Standard Email Tracking", "Web Campaign UTM").
* **Parameters** — Define the URL parameters included in this profile:
* **Parameter name** — The URL query parameter key (e.g., `utm_source`, `user_id`).
* **Default value** — An optional default value for the parameter.
Click **Save** to create the profile. It will be available for selection during workflow integration.
### Editing a Profile
Click on a profile in the table to open the edit drawer. Update the name or parameters as needed.
### Deleting a Profile
1. Click the **Delete** action on the profile row.
2. Confirm the deletion.
Deleting a variable profile does not affect already-deployed workflow integrations. However, future integrations will no longer be able to select this profile.
### Tips
* Create separate profiles for different channels (email vs. web) since they typically use different tracking parameters.
* Standardize parameter names across your team to ensure consistent analytics data.
* Variable profiles complement URL Parameter nodes in workflows — the profile provides the parameter structure, and the URL Parameter node reads the value at runtime.
***
## JSON Templates
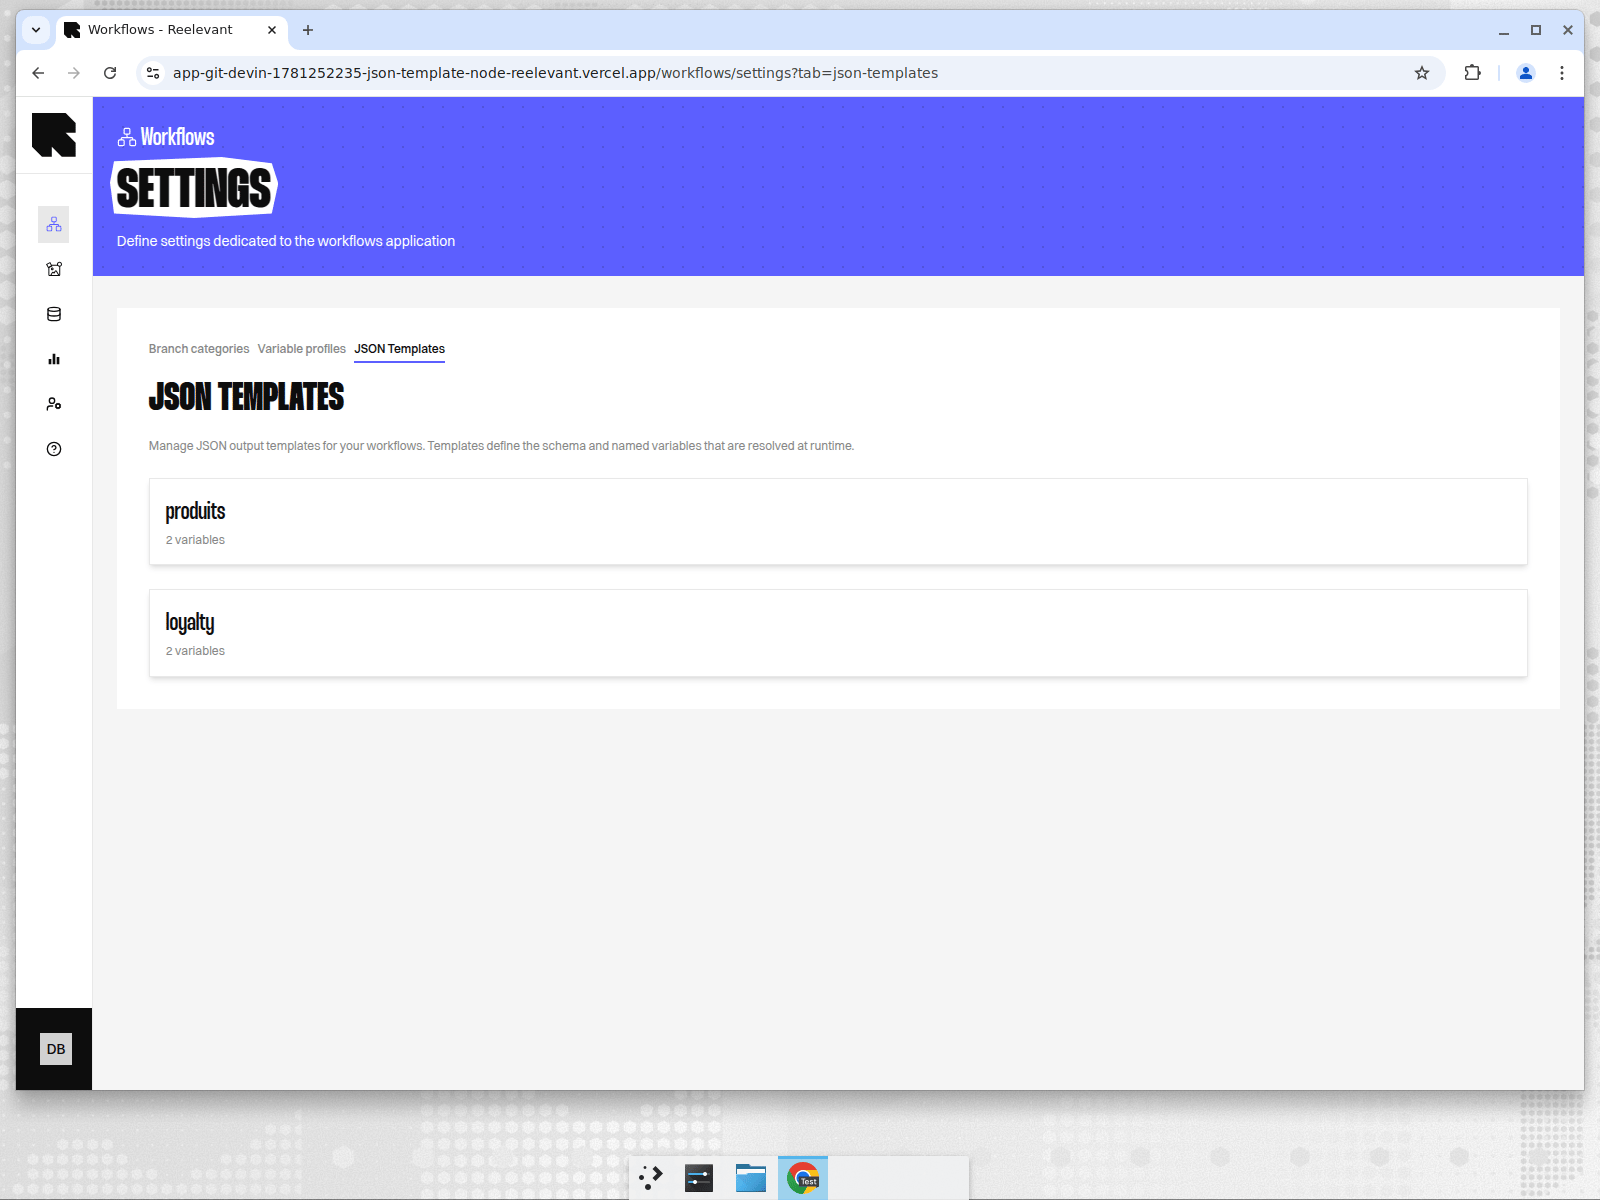 JSON Templates define the **structure and contract** of JSON payloads returned by [JSON Template output nodes](/product-guide/workflows/output-nodes/json-template). They are the single source of truth for what your API consumers (mobile apps, frontends, third-party integrations) will receive.
This section is intended for **engineering and contract teams** who define the API schema. Marketing teams use the resulting templates in the workflow editor — see [JSON Template output node](/product-guide/workflows/output-nodes/json-template) for usage instructions.
### Why Use JSON Templates?
JSON Templates separate **schema definition** from **data binding**:
* **Engineering** defines the shape (what fields exist, which are static, which are dynamic variables).
* **Marketing** decides what data fills each variable by connecting datasource fields in the workflow.
This separation means your frontend can rely on a stable contract — fields never change unexpectedly — while marketing retains full control over which personalised data is surfaced.
### Viewing Templates
The **JSON Templates** tab displays all configured templates with their name and variable count. Click a template to open its edit drawer.
### Creating a Template
Click the **Create** button in the top-right corner of the JSON Templates tab. A drawer opens on the right.
Enter a descriptive name (e.g., "Product Recommendations", "Loyalty Dashboard").
Select one or more **teams** that should have access to this template. This controls visibility — only workflows belonging to matching teams will see this template in their node configuration.
Use the **JSON editor** to write the template definition. Each field is a key-value pair where the value describes how it will be resolved:
* **Static fields** — `{ "type": "static", "value": }` — Hardcoded values that never change at runtime.
* **Dependency fields** — `{ "type": "dependency", "variable": "" }` — Dynamic slots bound to datasource fields by the marketing team.
```json theme={"theme":{"light":"github-light","dark":"github-dark"}}
{
"headline": { "type": "static", "value": "Recommended for you" },
"productName": { "type": "dependency", "variable": "productName" },
"loyaltyPoints": { "type": "dependency", "variable": "loyaltyPoints" }
}
```
At runtime, static values are returned as-is and dependency values are replaced with real data from the bound datasource.
For each dependency field in the definition, add a **variable** entry:
* **Name** — Must exactly match the `variable` value in the definition (e.g., `productName`).
* **Description** — Optional; helps marketing understand what the variable represents.
* **Value** — Choose how the variable resolves data:
* **Array** — retrieve all values from the datasource (e.g., a list of products).
* **Scalar** — retrieve a single value, chosen automatically (e.g., a single loyalty score).
* **Datasource item #1 … #20** — always retrieve one fixed position in the datasource (e.g., always the 2nd product).
Click **Save** to create the template. It becomes immediately available for selection in JSON Template output nodes across your workflows.
### Editing a Template
Click on a template in the list to open its edit drawer. You can update the name, JSON definition, and variables. Changes take effect on the **next publish** of any workflow using this template.
Changing the schema (adding/removing fields or renaming variables) may break existing integrations. Coordinate with consuming frontends before making structural changes.
### Deleting a Template
1. Open the template's edit drawer.
2. Click the **Delete** button.
3. Confirm the deletion in the modal.
Deleting a template will cause any workflow referencing it to fail publish validation. Make sure no active workflows depend on the template before deleting.
### JSON Definition Best Practices
* **Keep it flat when possible.** Nested objects are supported but flat schemas are easier for frontend teams to consume.
* **Use meaningful key names.** Keys like `productName`, `loyaltyScore`, `recommendedItems` are self-documenting.
* **Provide realistic static defaults.** Use values that reflect the expected type (e.g., `{ "type": "static", "value": "default text" }` for strings, `{ "type": "static", "value": 0 }` for numbers).
* **Document the contract externally.** Share the runtime output shape (with variables resolved) with your frontend/mobile team so they can build typed clients against it.
### Variable Configuration
Each variable represents a **dynamic slot** in the JSON payload:
| Property | Description |
| --------------- | --------------------------------------------------------------------------------------------------------------------------------------------------------------------------------------------------------------- |
| **Name** | Must exactly match a key in the JSON definition. Case-sensitive. |
| **Description** | Human-readable explanation shown to marketing in the workflow editor. |
| **Value** | How the variable resolves data. **Array** iterates over all datasource rows. **Scalar** returns a single value chosen automatically. **Datasource item #N** always returns one fixed position (item #1 to #20). |
### Publish Validation
When a workflow with JSON Template output nodes is published, the system validates:
1. **Template exists** — The referenced template ID must point to an existing template.
2. **Cross-branch consistency** — All JSON Template nodes across all branches must reference the **same template**. This ensures every branch produces the same JSON shape.
If validation fails, the publish is blocked with a clear error message indicating which node or branch has a mismatch.
JSON Templates define the **structure and contract** of JSON payloads returned by [JSON Template output nodes](/product-guide/workflows/output-nodes/json-template). They are the single source of truth for what your API consumers (mobile apps, frontends, third-party integrations) will receive.
This section is intended for **engineering and contract teams** who define the API schema. Marketing teams use the resulting templates in the workflow editor — see [JSON Template output node](/product-guide/workflows/output-nodes/json-template) for usage instructions.
### Why Use JSON Templates?
JSON Templates separate **schema definition** from **data binding**:
* **Engineering** defines the shape (what fields exist, which are static, which are dynamic variables).
* **Marketing** decides what data fills each variable by connecting datasource fields in the workflow.
This separation means your frontend can rely on a stable contract — fields never change unexpectedly — while marketing retains full control over which personalised data is surfaced.
### Viewing Templates
The **JSON Templates** tab displays all configured templates with their name and variable count. Click a template to open its edit drawer.
### Creating a Template
Click the **Create** button in the top-right corner of the JSON Templates tab. A drawer opens on the right.
Enter a descriptive name (e.g., "Product Recommendations", "Loyalty Dashboard").
Select one or more **teams** that should have access to this template. This controls visibility — only workflows belonging to matching teams will see this template in their node configuration.
Use the **JSON editor** to write the template definition. Each field is a key-value pair where the value describes how it will be resolved:
* **Static fields** — `{ "type": "static", "value": }` — Hardcoded values that never change at runtime.
* **Dependency fields** — `{ "type": "dependency", "variable": "" }` — Dynamic slots bound to datasource fields by the marketing team.
```json theme={"theme":{"light":"github-light","dark":"github-dark"}}
{
"headline": { "type": "static", "value": "Recommended for you" },
"productName": { "type": "dependency", "variable": "productName" },
"loyaltyPoints": { "type": "dependency", "variable": "loyaltyPoints" }
}
```
At runtime, static values are returned as-is and dependency values are replaced with real data from the bound datasource.
For each dependency field in the definition, add a **variable** entry:
* **Name** — Must exactly match the `variable` value in the definition (e.g., `productName`).
* **Description** — Optional; helps marketing understand what the variable represents.
* **Value** — Choose how the variable resolves data:
* **Array** — retrieve all values from the datasource (e.g., a list of products).
* **Scalar** — retrieve a single value, chosen automatically (e.g., a single loyalty score).
* **Datasource item #1 … #20** — always retrieve one fixed position in the datasource (e.g., always the 2nd product).
Click **Save** to create the template. It becomes immediately available for selection in JSON Template output nodes across your workflows.
### Editing a Template
Click on a template in the list to open its edit drawer. You can update the name, JSON definition, and variables. Changes take effect on the **next publish** of any workflow using this template.
Changing the schema (adding/removing fields or renaming variables) may break existing integrations. Coordinate with consuming frontends before making structural changes.
### Deleting a Template
1. Open the template's edit drawer.
2. Click the **Delete** button.
3. Confirm the deletion in the modal.
Deleting a template will cause any workflow referencing it to fail publish validation. Make sure no active workflows depend on the template before deleting.
### JSON Definition Best Practices
* **Keep it flat when possible.** Nested objects are supported but flat schemas are easier for frontend teams to consume.
* **Use meaningful key names.** Keys like `productName`, `loyaltyScore`, `recommendedItems` are self-documenting.
* **Provide realistic static defaults.** Use values that reflect the expected type (e.g., `{ "type": "static", "value": "default text" }` for strings, `{ "type": "static", "value": 0 }` for numbers).
* **Document the contract externally.** Share the runtime output shape (with variables resolved) with your frontend/mobile team so they can build typed clients against it.
### Variable Configuration
Each variable represents a **dynamic slot** in the JSON payload:
| Property | Description |
| --------------- | --------------------------------------------------------------------------------------------------------------------------------------------------------------------------------------------------------------- |
| **Name** | Must exactly match a key in the JSON definition. Case-sensitive. |
| **Description** | Human-readable explanation shown to marketing in the workflow editor. |
| **Value** | How the variable resolves data. **Array** iterates over all datasource rows. **Scalar** returns a single value chosen automatically. **Datasource item #N** always returns one fixed position (item #1 to #20). |
### Publish Validation
When a workflow with JSON Template output nodes is published, the system validates:
1. **Template exists** — The referenced template ID must point to an existing template.
2. **Cross-branch consistency** — All JSON Template nodes across all branches must reference the **same template**. This ensures every branch produces the same JSON shape.
If validation fails, the publish is blocked with a clear error message indicating which node or branch has a mismatch.