> ## Documentation Index
> Fetch the complete documentation index at: https://docs.reelevant.com/llms.txt
> Use this file to discover all available pages before exploring further.
# Service accounts
> Create service accounts for integrations and manage their client credentials
A service account (a dedicated account for an integration) lets an integration connect without using a person's email address or password.
## Create a service account
Use a service account when an integration needs its own access. A role and at least one Team control what it can use.
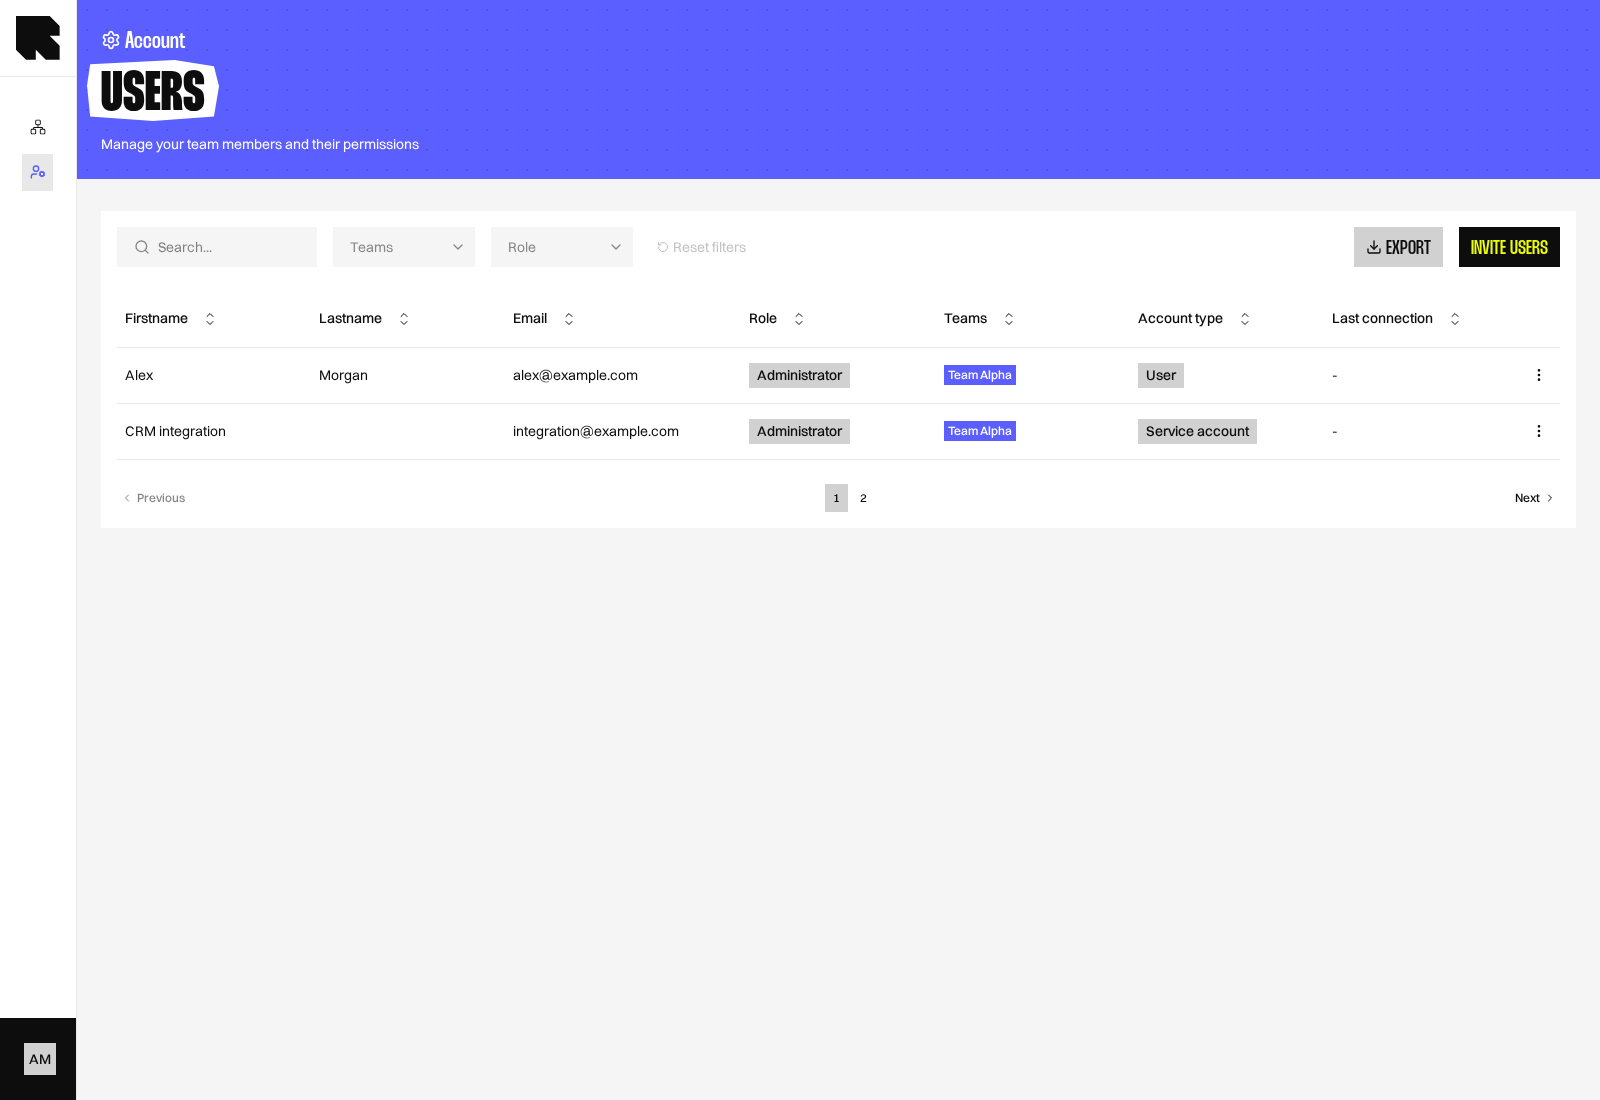 Go to **Account > Users**, then select **Invite users**.
Select **Service account** in the **Account type** step.
Go to **Account > Users**, then select **Invite users**.
Select **Service account** in the **Account type** step.
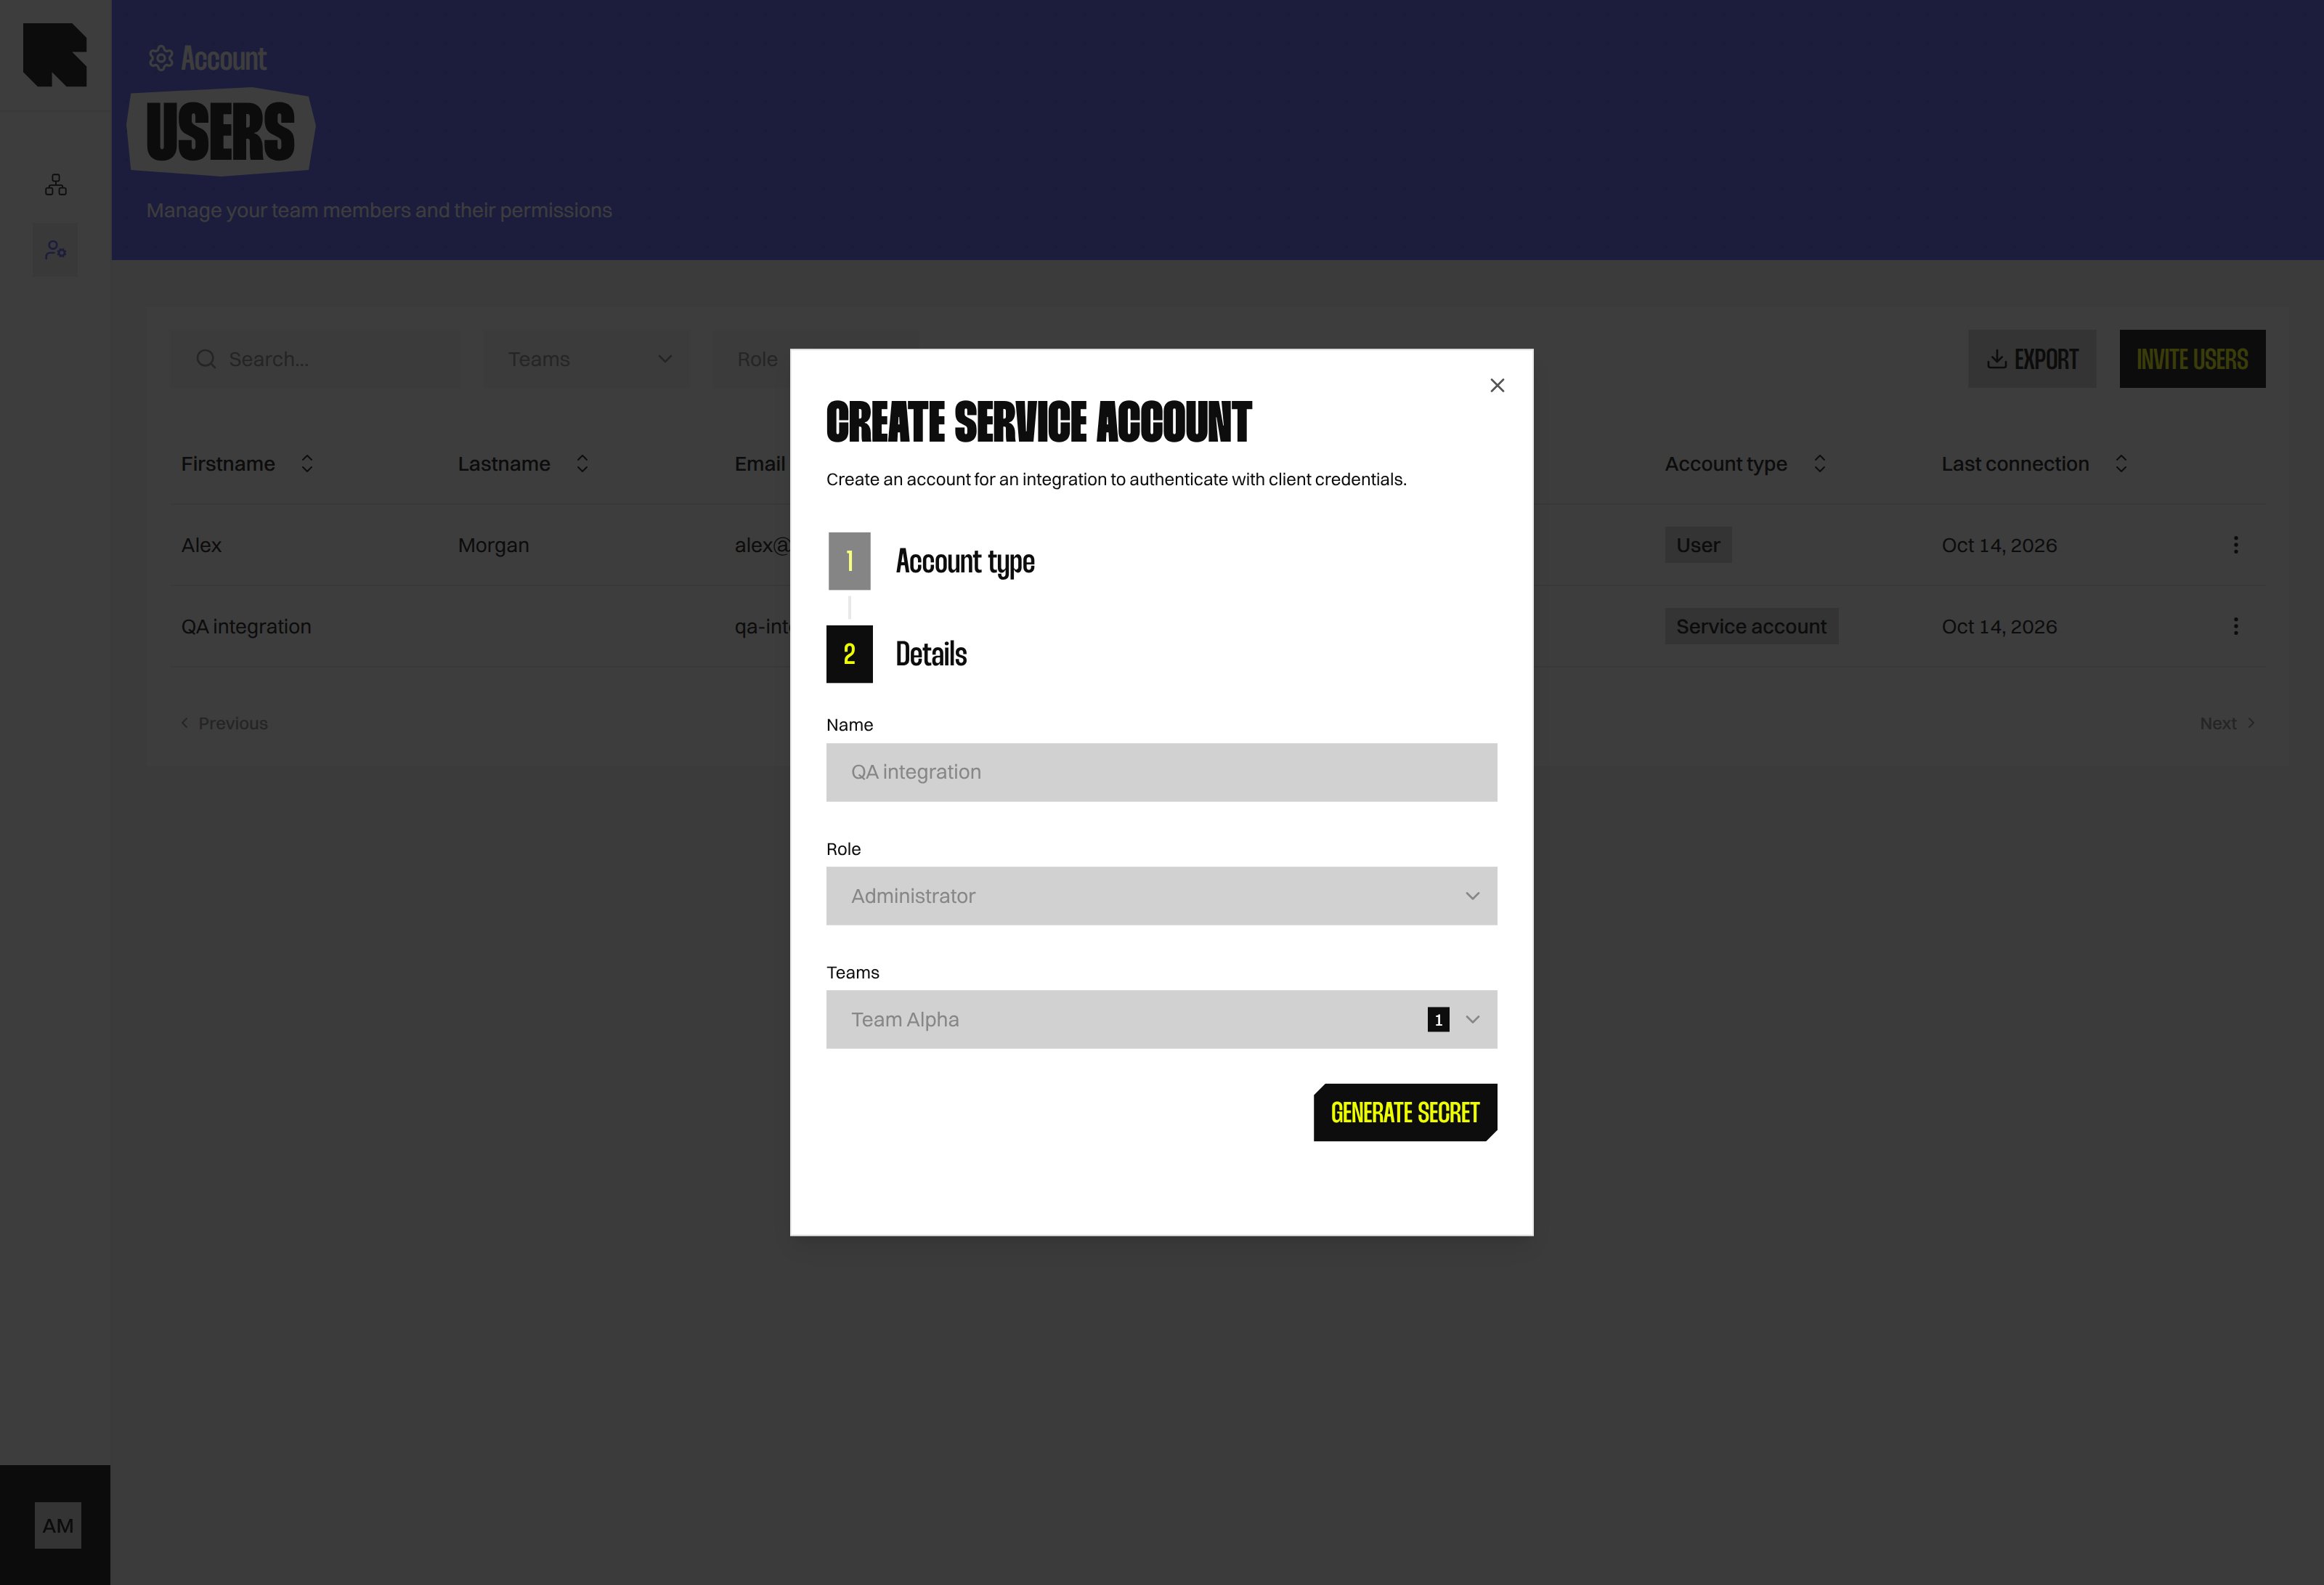
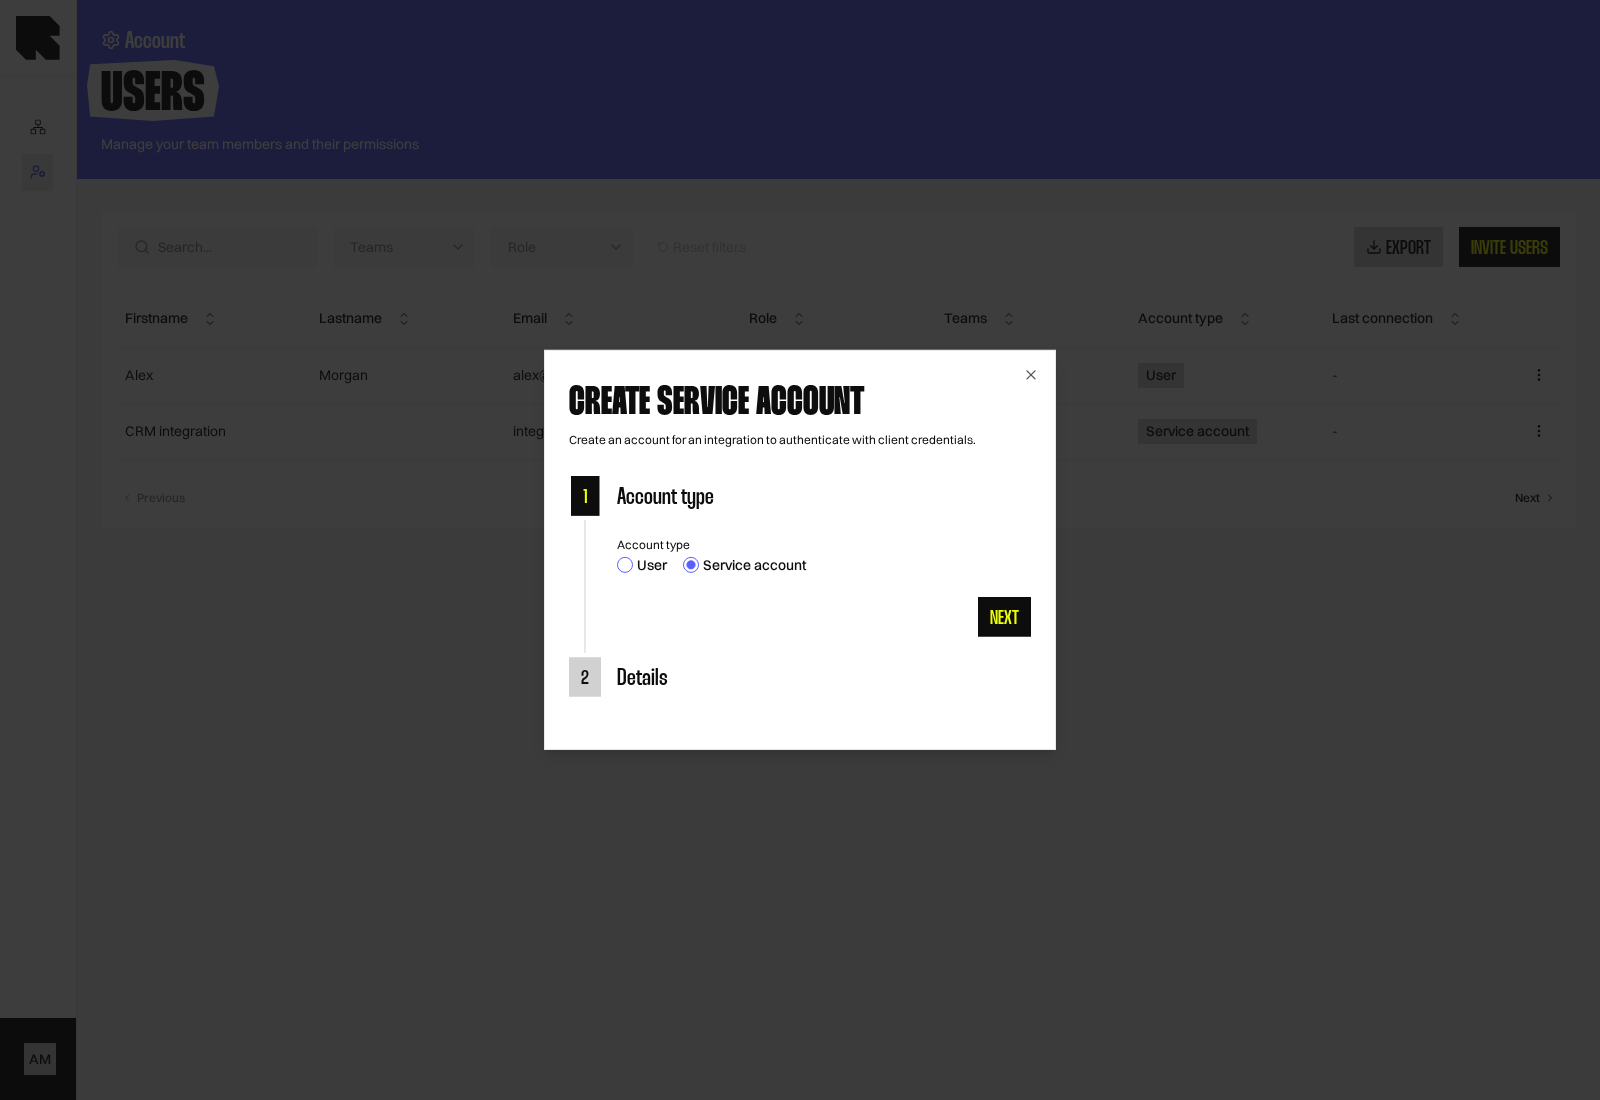 Enter a **Name**, choose a **Role**, and select at least one **Team**. Choose a role that grants only the access the integration needs.
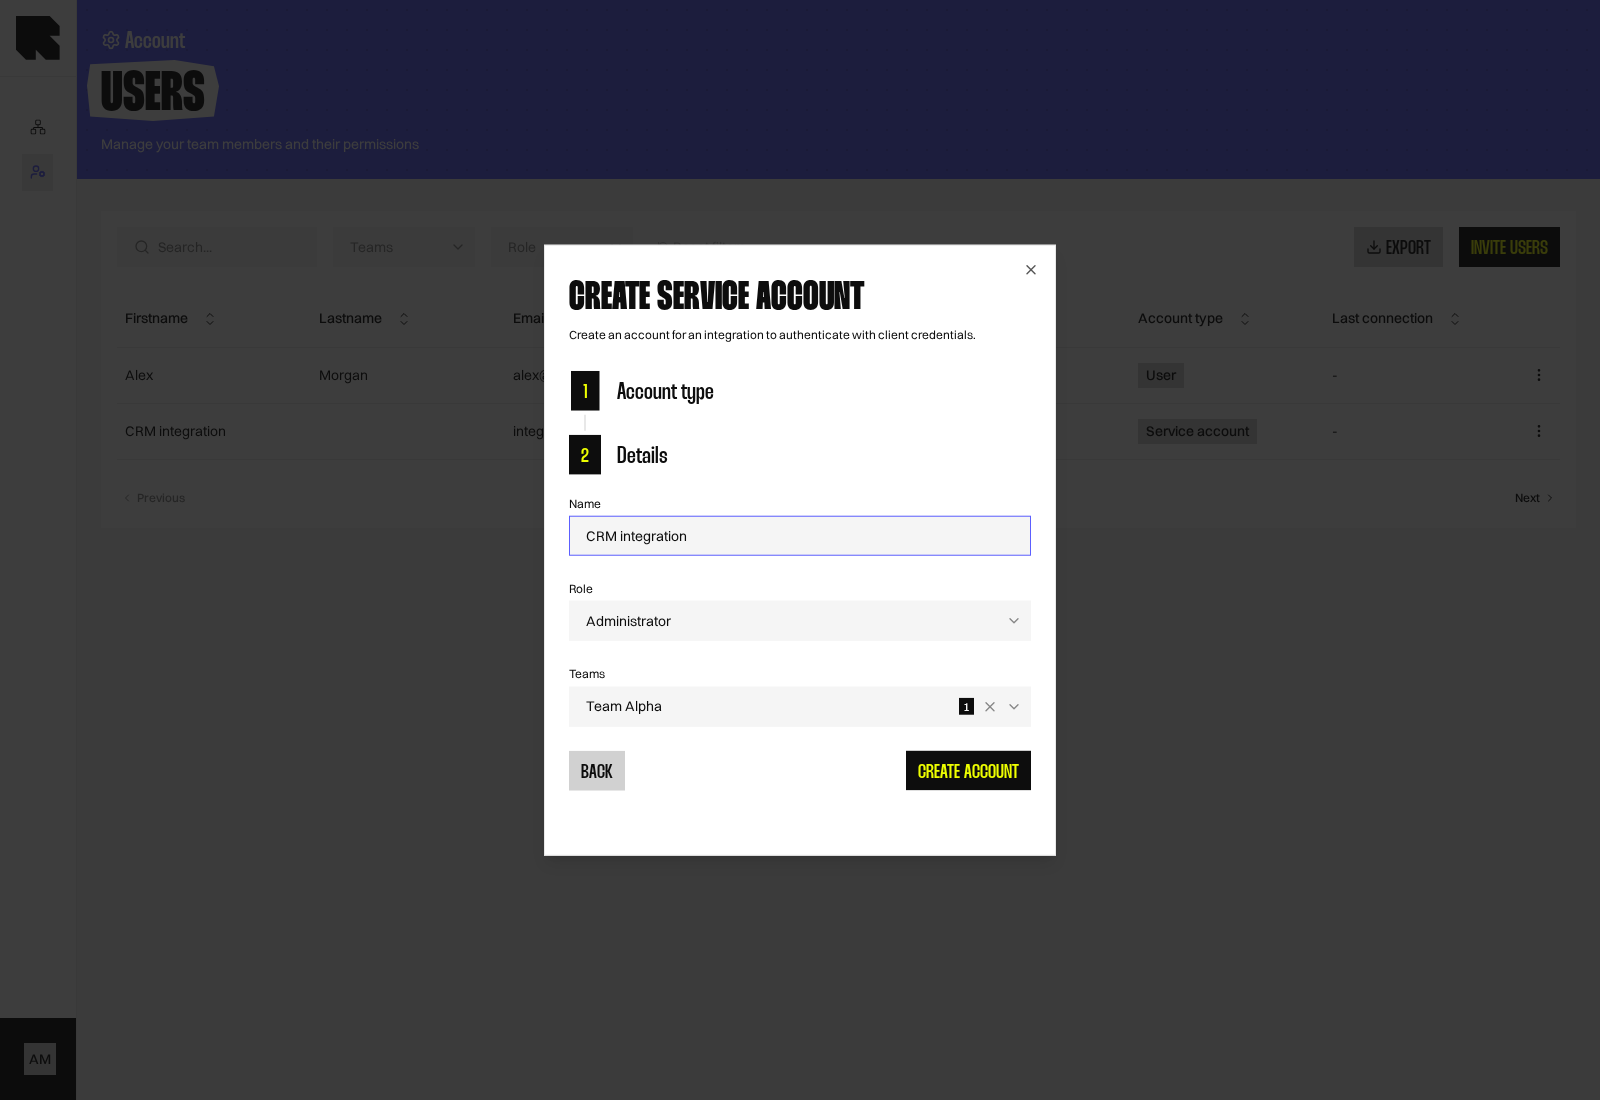 Select **Create account**. Reelevant creates the account and its first secret automatically.
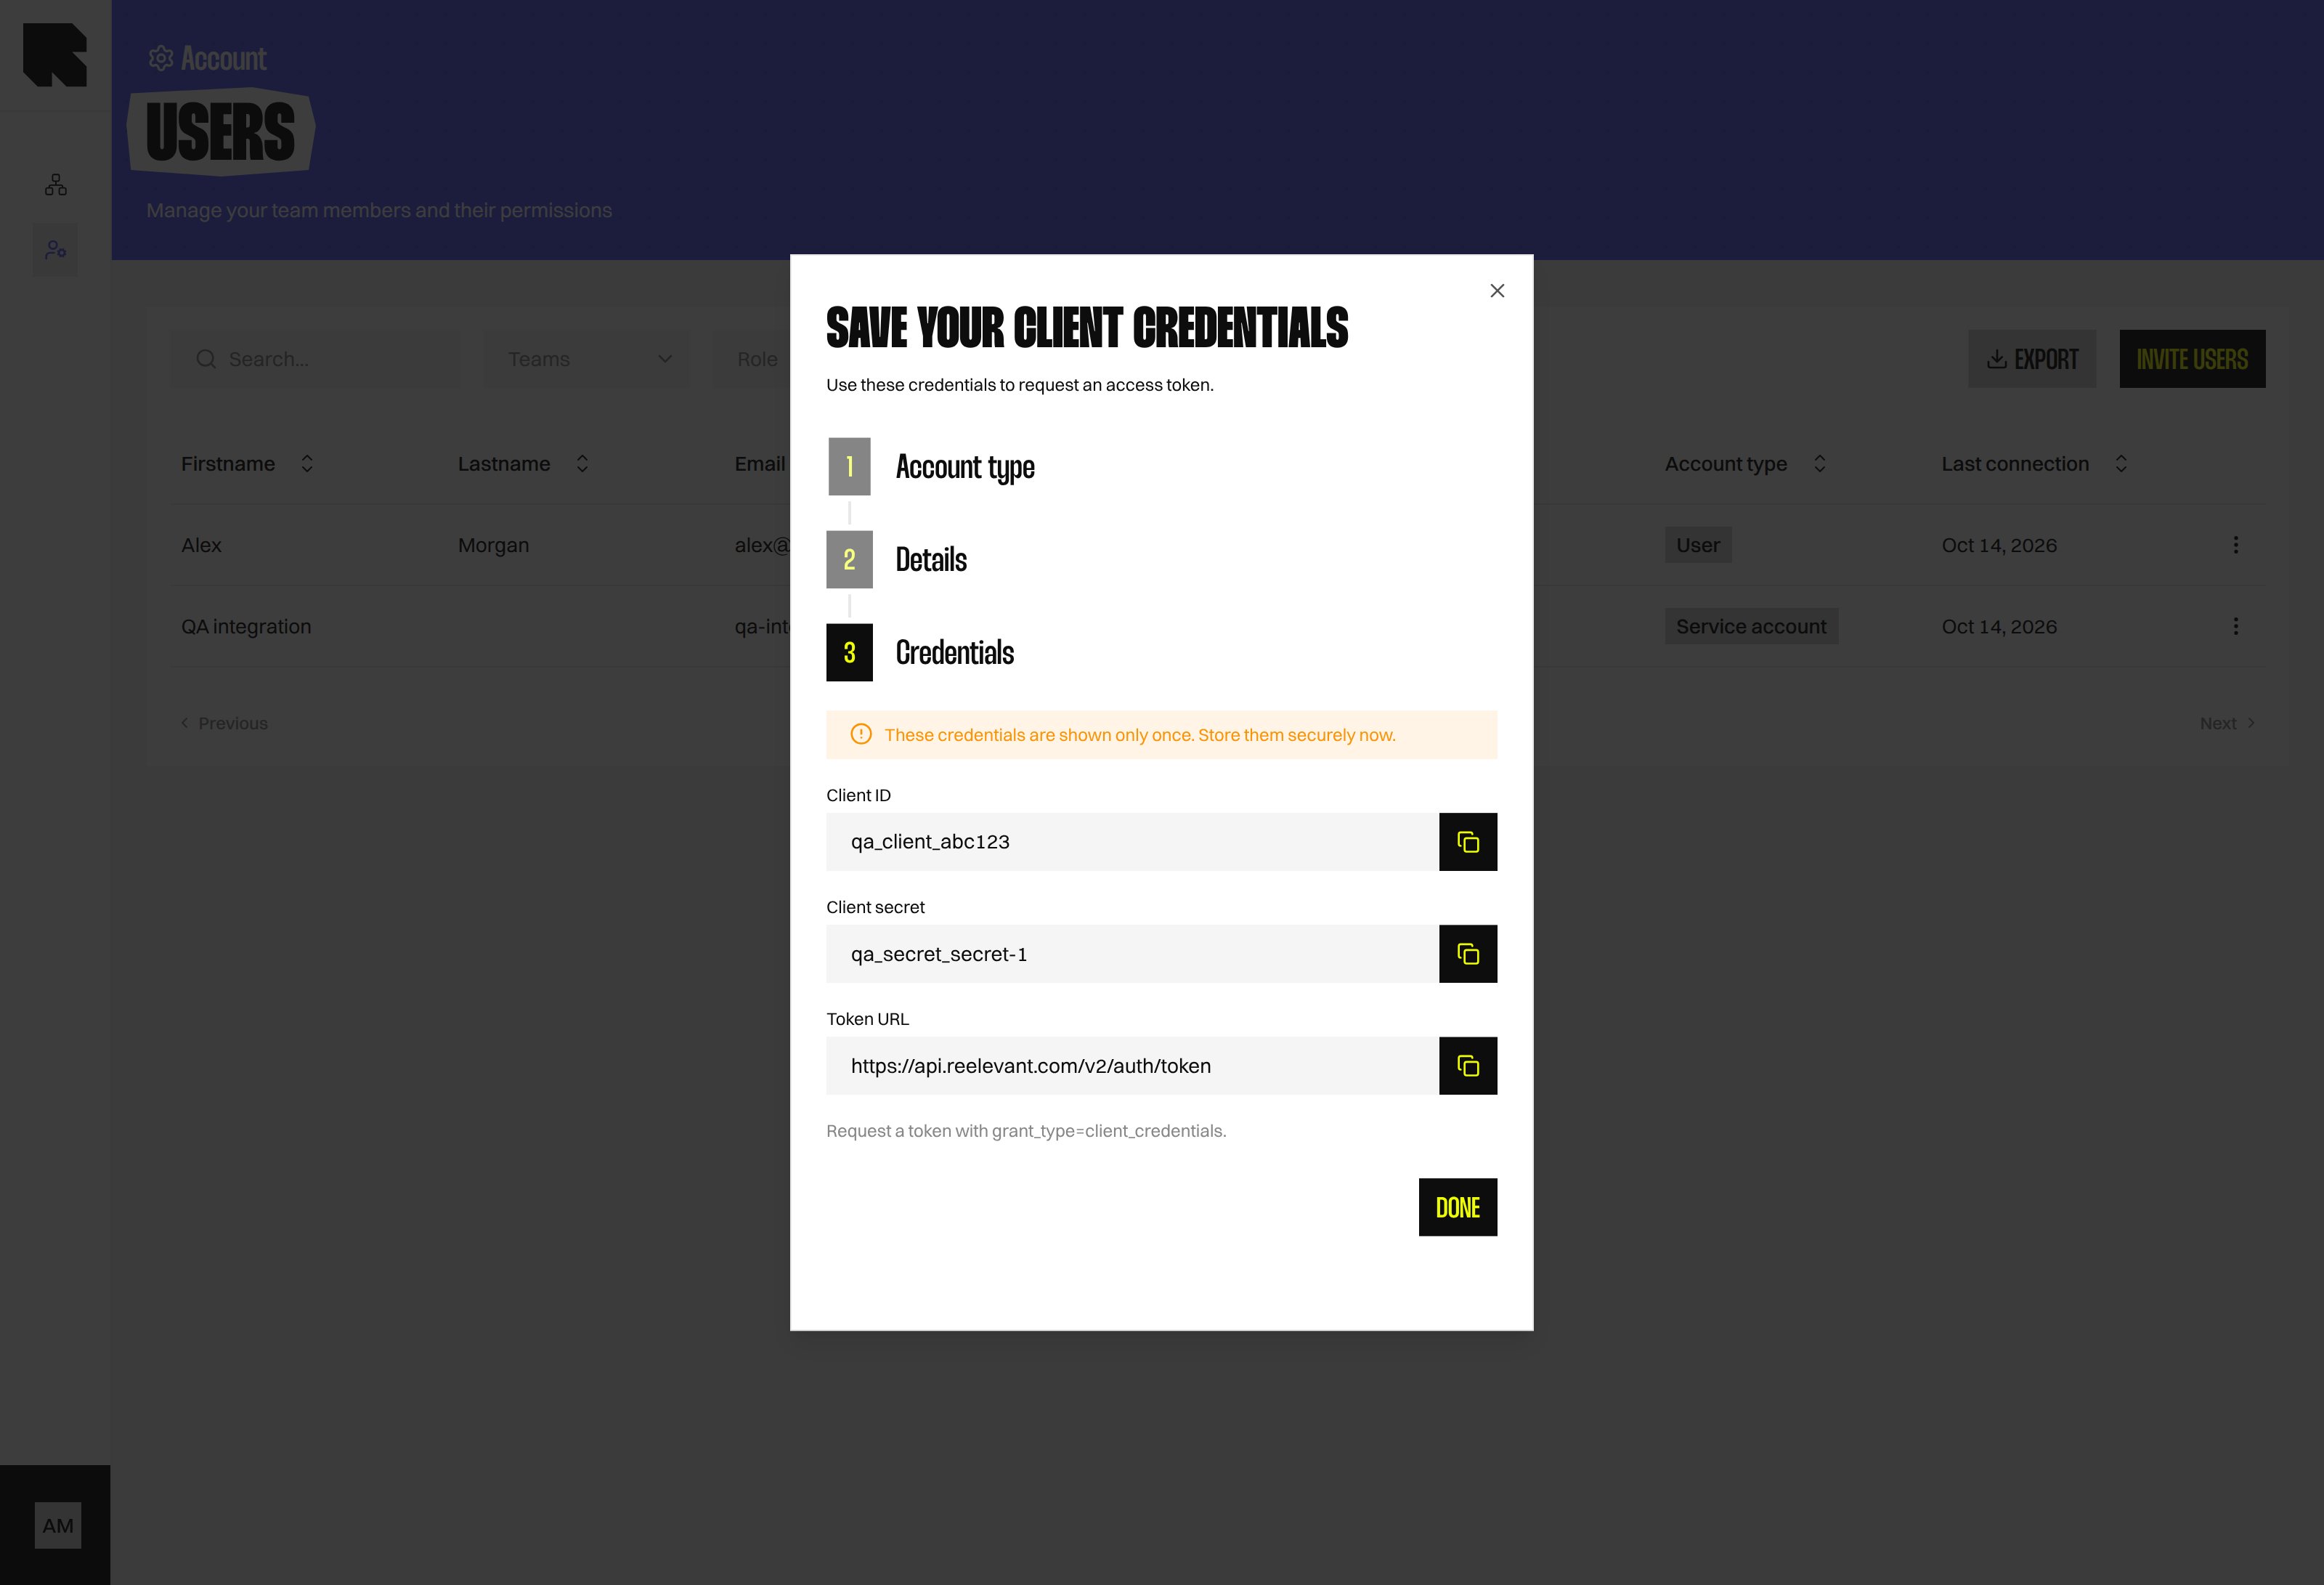 Copy the credentials before leaving this screen. The **Client secret** is shown only once; you cannot reveal it later.
If the first secret cannot be generated, the account is still created. Generate one later from **Manage client secrets**.
Copy the credentials before leaving this screen. The **Client secret** is shown only once; you cannot reveal it later.
If the first secret cannot be generated, the account is still created. Generate one later from **Manage client secrets**.
 ## Manage client secrets
Select **Manage client secrets** from the service account row's actions menu. The drawer shows each secret's label, status, creation date, and last use.
## Manage client secrets
Select **Manage client secrets** from the service account row's actions menu. The drawer shows each secret's label, status, creation date, and last use.
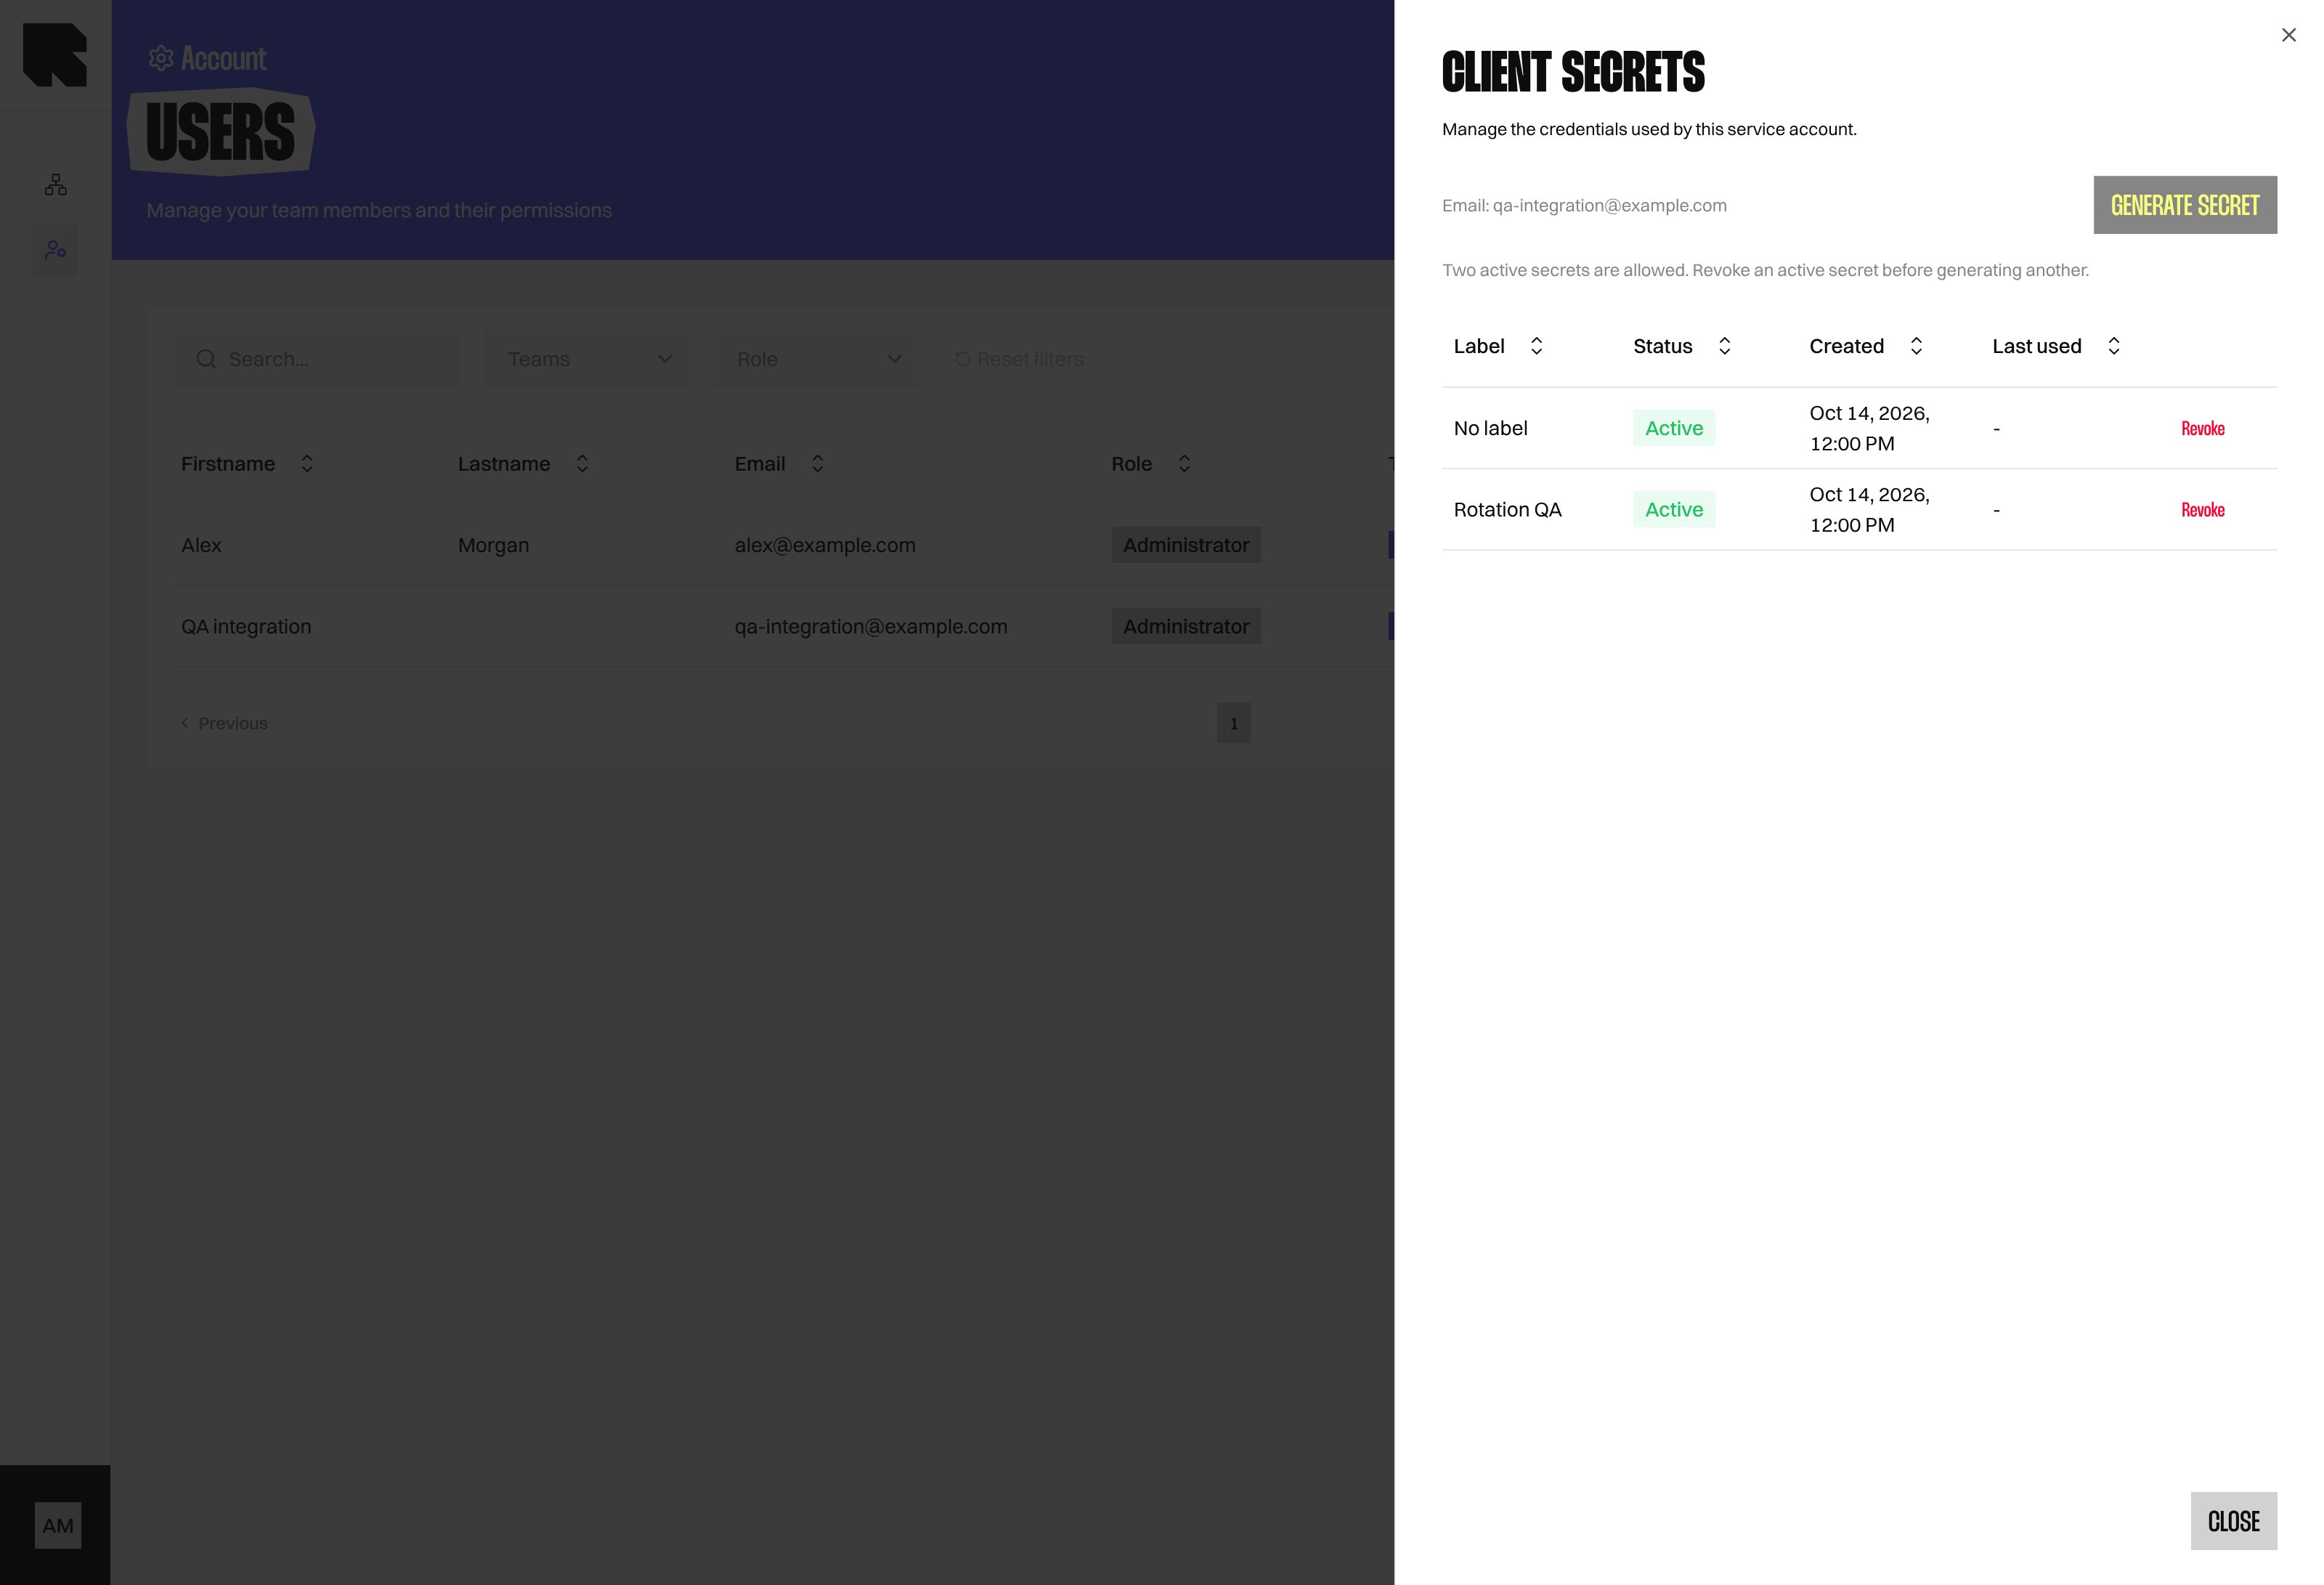 To add a secret, select **Generate secret**, enter an optional **Label**, and select **Generate secret** again. Copy and store the new credentials when they appear.
You can have up to two active secrets. Create a replacement before revoking the current secret.
Revoking a client secret immediately stops access tokens issued with it. Update the integration to use another secret before revoking the current one.
## What's Next?
Review user accounts, roles, and Teams.
Choose which actions a service account can perform.
To add a secret, select **Generate secret**, enter an optional **Label**, and select **Generate secret** again. Copy and store the new credentials when they appear.
You can have up to two active secrets. Create a replacement before revoking the current secret.
Revoking a client secret immediately stops access tokens issued with it. Update the integration to use another secret before revoking the current one.
## What's Next?
Review user accounts, roles, and Teams.
Choose which actions a service account can perform.