> ## Documentation Index
> Fetch the complete documentation index at: https://docs.reelevant.com/llms.txt
> Use this file to discover all available pages before exploring further.
# Users
> Invite, edit, and manage platform users and their profiles
 ## Users Listing
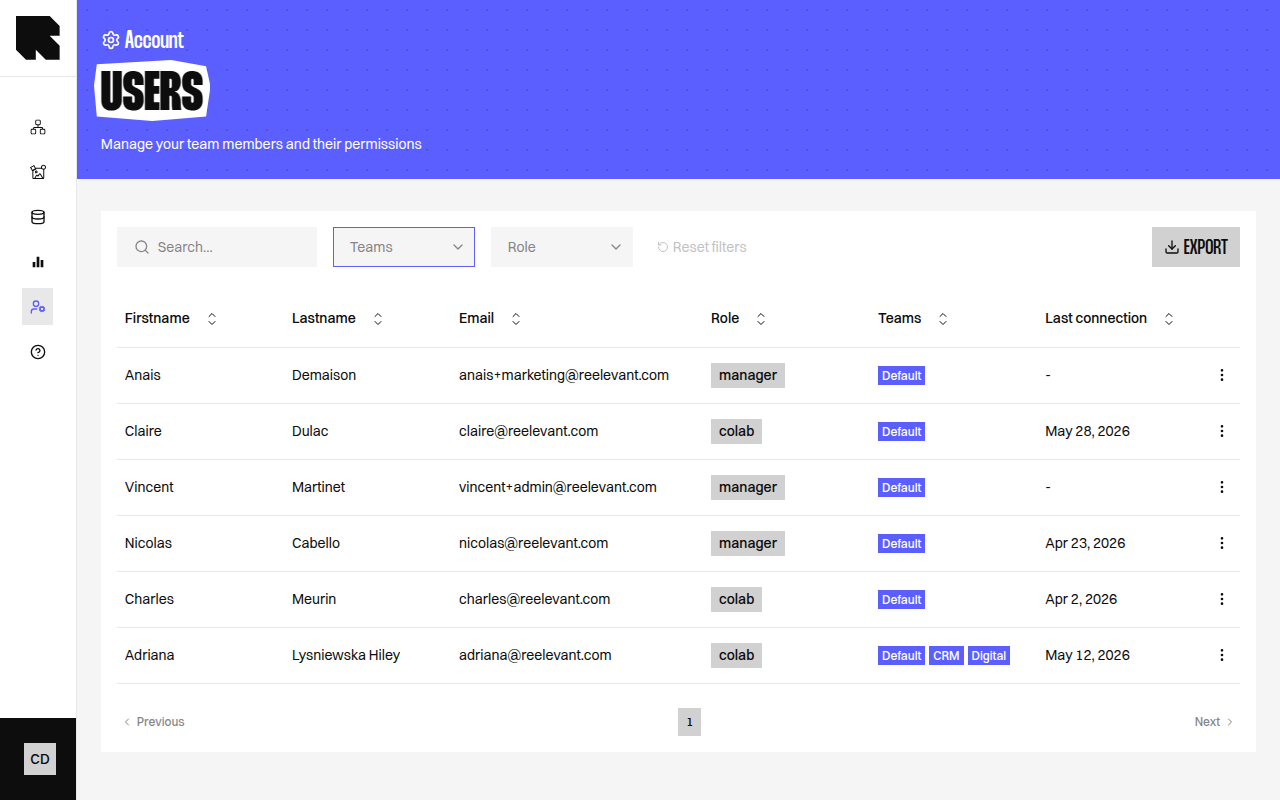
The Users page displays all platform users in a table:
| Column | Description |
| ------------------- | ------------------------------------------ |
| **Firstname** | User's first name. |
| **Lastname** | User's last name. |
| **Email** | User's email address. |
| **Role** | The assigned role. |
| **Teams** | The teams the user belongs to. |
| **Permissions** | Quick view of the user's permission level. |
| **Last connection** | When the user last logged in. |
Use the search bar to find users by email.
## Inviting a User
Click the **Invite users** button in the top-right corner.
| Field | Description |
| --------- | ---------------------------------------- |
| **Email** | The email address of the user to invite. |
| **Role** | Select a role from the available roles. |
| **Teams** | Select one or more teams for the user. |
Click **Create** to generate the invitation. The modal will show either:
* **Registration URL** — Share this URL with the user to complete their registration (for email/password accounts).
* **SSO Login URL** — Share this URL with the user to log in via SSO (if SSO is configured).
Click **Copy and close** to copy the URL to your clipboard.
## Editing a User
Click the actions menu on a user row and select **Edit** to open the edit modal:
| Field | Description |
| -------------- | ------------------------ |
| **First name** | User's first name. |
| **Last name** | User's last name. |
| **Role** | Change the user's role. |
| **Teams** | Update team assignments. |
Click **Save** to apply changes.
## Self-Editing Your Profile
Click on your own user row or avatar to open the **Edit my profile** modal with additional options:
### Profile
| Field | Description |
| -------------- | --------------------------------------- |
| **First name** | Your first name. |
| **Last name** | Your last name. |
| **Language** | Interface language — English or French. |
| **Theme** | Light, Dark, or System. |
### Change Password
| Field | Description |
| ------------------------ | -------------------------- |
| **Current password** | Your current password. |
| **New password** | The new password. |
| **Confirm new password** | Re-enter the new password. |
Click **Change password** to update.
### Two-Factor Authentication
Enable 2FA for additional account security:
Install an authenticator app like Google Authenticator or Authy on your phone.
Use your authenticator app to scan the QR code displayed in the modal. You can also manually enter the **Secret** key.
Enter the 6-digit code from your authenticator app.
Click **Complete setup** to enable 2FA. A confirmation message "Two-factor authentication enabled" will appear.
## Deleting a User
1. Click the actions menu and select **Delete**.
2. A confirmation dialog asks you to type a confirmation word.
3. Click **Delete** to permanently remove the user.
Deleting a user is irreversible. The user will immediately lose all access to the platform.
## Exporting Users
Click **Export users** to download a list of all users as a file.
## Users Listing
The Users page displays all platform users in a table:
| Column | Description |
| ------------------- | ------------------------------------------ |
| **Firstname** | User's first name. |
| **Lastname** | User's last name. |
| **Email** | User's email address. |
| **Role** | The assigned role. |
| **Teams** | The teams the user belongs to. |
| **Permissions** | Quick view of the user's permission level. |
| **Last connection** | When the user last logged in. |
Use the search bar to find users by email.
## Inviting a User
Click the **Invite users** button in the top-right corner.
| Field | Description |
| --------- | ---------------------------------------- |
| **Email** | The email address of the user to invite. |
| **Role** | Select a role from the available roles. |
| **Teams** | Select one or more teams for the user. |
Click **Create** to generate the invitation. The modal will show either:
* **Registration URL** — Share this URL with the user to complete their registration (for email/password accounts).
* **SSO Login URL** — Share this URL with the user to log in via SSO (if SSO is configured).
Click **Copy and close** to copy the URL to your clipboard.
## Editing a User
Click the actions menu on a user row and select **Edit** to open the edit modal:
| Field | Description |
| -------------- | ------------------------ |
| **First name** | User's first name. |
| **Last name** | User's last name. |
| **Role** | Change the user's role. |
| **Teams** | Update team assignments. |
Click **Save** to apply changes.
## Self-Editing Your Profile
Click on your own user row or avatar to open the **Edit my profile** modal with additional options:
### Profile
| Field | Description |
| -------------- | --------------------------------------- |
| **First name** | Your first name. |
| **Last name** | Your last name. |
| **Language** | Interface language — English or French. |
| **Theme** | Light, Dark, or System. |
### Change Password
| Field | Description |
| ------------------------ | -------------------------- |
| **Current password** | Your current password. |
| **New password** | The new password. |
| **Confirm new password** | Re-enter the new password. |
Click **Change password** to update.
### Two-Factor Authentication
Enable 2FA for additional account security:
Install an authenticator app like Google Authenticator or Authy on your phone.
Use your authenticator app to scan the QR code displayed in the modal. You can also manually enter the **Secret** key.
Enter the 6-digit code from your authenticator app.
Click **Complete setup** to enable 2FA. A confirmation message "Two-factor authentication enabled" will appear.
## Deleting a User
1. Click the actions menu and select **Delete**.
2. A confirmation dialog asks you to type a confirmation word.
3. Click **Delete** to permanently remove the user.
Deleting a user is irreversible. The user will immediately lose all access to the platform.
## Exporting Users
Click **Export users** to download a list of all users as a file.