> ## Documentation Index
> Fetch the complete documentation index at: https://docs.reelevant.com/llms.txt
> Use this file to discover all available pages before exploring further.
# Content Listing
> Browse, search, and manage all your content templates from the listing page
 ## Content Listing
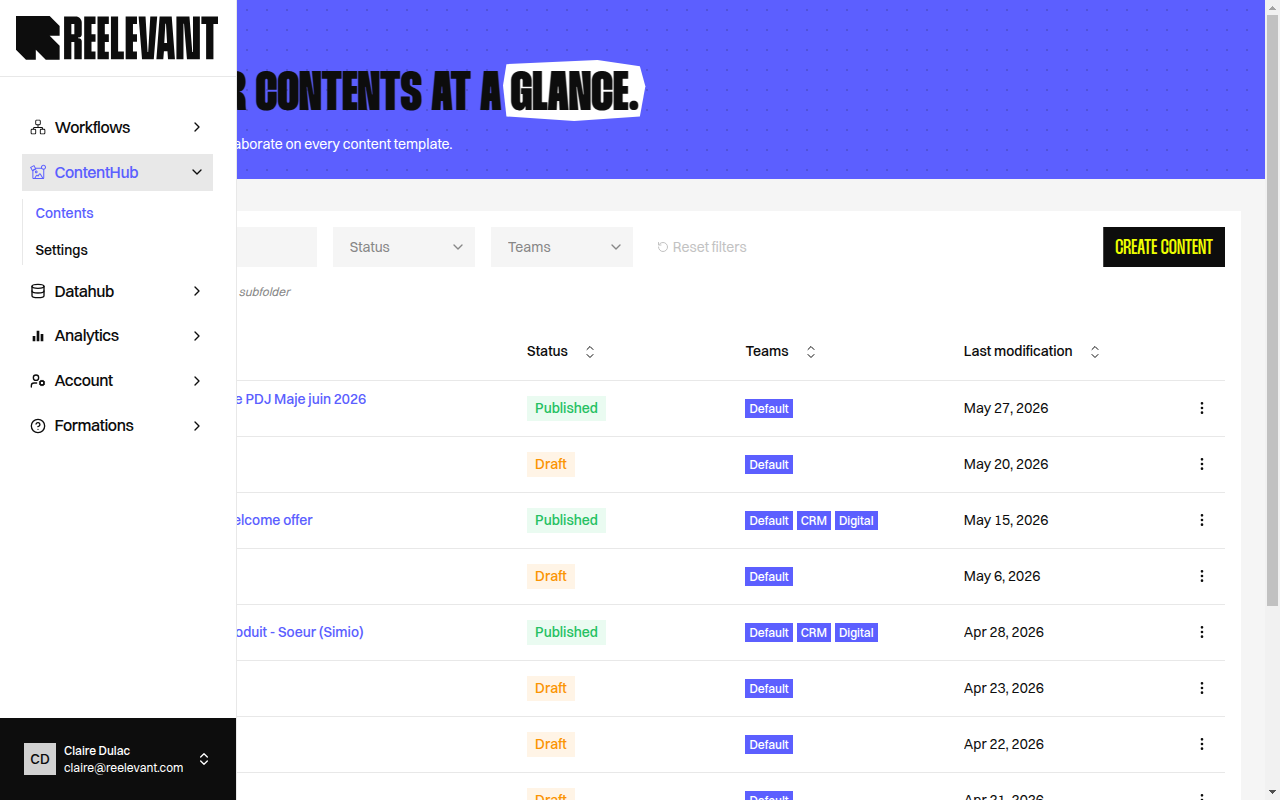
When you open the **Content Editor** application from the sidebar, you land on the content listing page. This table displays all your content templates with the following columns:
| Column | Description |
| --------------------- | ------------------------------------------------------------------ |
| **Content** | The content name. Click to open it in the editor. |
| **Status** | Current lifecycle status — Draft, Published, Publishing, or Error. |
| **Teams** | The teams the content belongs to. |
| **Last modification** | When the content was last updated. |
Use the search bar to find contents by name. You can filter the listing by:
* **Status** — Draft, Published, Inactive, Publishing, Error.
* **Teams** — Filter by team.
The hierarchy breadcrumbs let you navigate through folders for organized content management.
## Creating a Content
Click the **Create content** button in the top-right corner of the listing page. A modal dialog opens.
The creation form has the following fields:
* **Content name** — A descriptive name for your content template.
* **Description** — An optional short description (max 50 characters).
* **Teams** — Select one or more teams that should have access.
* **Folder configuration** — Optionally place the content within a folder hierarchy.
* **Import design** — Optionally import a Figma JSON export or PSD file to start from an existing design. See [Design Import](/product-guide/contents/design-import) for details.
Click **Create content** to create the template. You will be redirected to the editor.
## Editing Content Properties
To update a content's properties after creation:
1. Open the content's **actions menu** (three dots) in the listing table.
2. Select **Settings**.
3. Update the name, description, teams, or folder as needed.
4. Click **Save changes** to apply.
## Archiving a Content
To archive a content that is no longer needed:
1. Open the content's **actions menu** in the listing table.
2. Select **Archive**.
3. A confirmation dialog asks you to type a validation word to confirm.
If the content is used by one or more [workflows](/product-guide/workflows/overview), the archive dialog will show which workflows reference it. You must remove the content from those workflows before archiving.
## Content Listing
When you open the **Content Editor** application from the sidebar, you land on the content listing page. This table displays all your content templates with the following columns:
| Column | Description |
| --------------------- | ------------------------------------------------------------------ |
| **Content** | The content name. Click to open it in the editor. |
| **Status** | Current lifecycle status — Draft, Published, Publishing, or Error. |
| **Teams** | The teams the content belongs to. |
| **Last modification** | When the content was last updated. |
Use the search bar to find contents by name. You can filter the listing by:
* **Status** — Draft, Published, Inactive, Publishing, Error.
* **Teams** — Filter by team.
The hierarchy breadcrumbs let you navigate through folders for organized content management.
## Creating a Content
Click the **Create content** button in the top-right corner of the listing page. A modal dialog opens.
The creation form has the following fields:
* **Content name** — A descriptive name for your content template.
* **Description** — An optional short description (max 50 characters).
* **Teams** — Select one or more teams that should have access.
* **Folder configuration** — Optionally place the content within a folder hierarchy.
* **Import design** — Optionally import a Figma JSON export or PSD file to start from an existing design. See [Design Import](/product-guide/contents/design-import) for details.
Click **Create content** to create the template. You will be redirected to the editor.
## Editing Content Properties
To update a content's properties after creation:
1. Open the content's **actions menu** (three dots) in the listing table.
2. Select **Settings**.
3. Update the name, description, teams, or folder as needed.
4. Click **Save changes** to apply.
## Archiving a Content
To archive a content that is no longer needed:
1. Open the content's **actions menu** in the listing table.
2. Select **Archive**.
3. A confirmation dialog asks you to type a validation word to confirm.
If the content is used by one or more [workflows](/product-guide/workflows/overview), the archive dialog will show which workflows reference it. You must remove the content from those workflows before archiving.