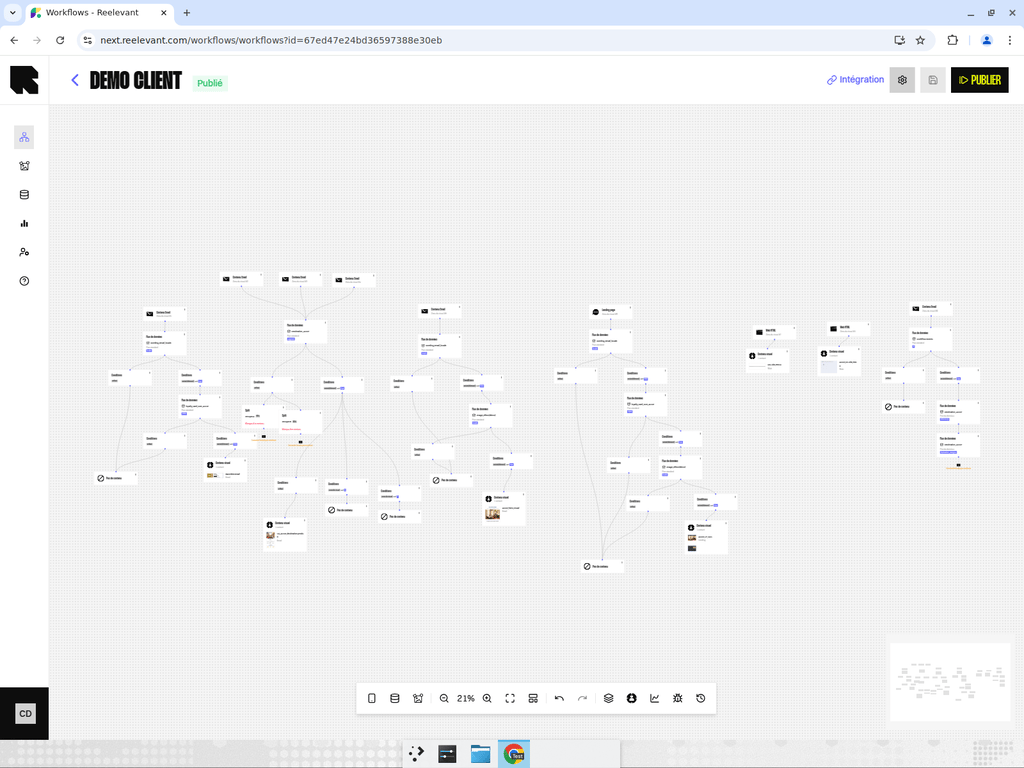
Editor Layout
The workflow editor is a full-screen, visual canvas where you build your workflow by adding and connecting nodes. It consists of three main areas:- Header bar — Displays the workflow name, status badge, and action buttons (Settings, Save, Publish, Use).
- Canvas — The main interactive area where nodes are displayed as a flow diagram. You can pan, zoom, and drag nodes around.
- Bottom toolbar — A menu bar at the bottom of the canvas with tools for adding nodes, zooming, undo/redo, and more.
Header Actions
The editor header provides quick access to key workflow operations:| Action | Description |
|---|---|
| Back arrow | Navigate back to the workflow listing. |
| Settings (gear icon) | Edit the workflow name, description, teams, and folder. |
| Save | Save the current draft without publishing. Only enabled when there are unsaved changes. |
| Publish | Validate and publish the workflow to make it live. See Publishing. |
| Use | Open the Integration modal to get deployment links (only available when published). |
Bottom Toolbar
The bottom toolbar is organized into sections:Adding Nodes
| Tool | Description |
|---|---|
| Channel (smartphone icon) | Open the channel picker to add a channel node. |
| Data (database icon) | Hover to reveal the data node menu — datasources, URL parameters, geolocation, weather, transforms, etc. |
| Output (content icon) | Open the content types drawer to add visual content, JSON format, or empty output nodes. |
Canvas Navigation
| Tool | Description |
|---|---|
| Zoom out / Zoom in | Adjust the zoom level of the canvas. The current zoom percentage is displayed between the buttons. |
| Fit to screen | Auto-zoom to fit all nodes within the viewport. |
| Auto-layout | Automatically arrange all nodes in a clean, readable layout. |
History
| Tool | Description |
|---|---|
| Undo | Revert the last action. |
| Redo | Re-apply the last undone action. |
View Modes
| Tool | Description |
|---|---|
| Nested nodes | Open a drawer listing nodes that aren’t visible on the main canvas (nested inside other nodes). |
| Individualized branches | Toggle highlighting of branches that deliver personalized content. |
| Statistics mode | Switch between editor and statistics view to see traffic distribution across branches. |
| Debug mode | Toggle debug information on nodes (execution times, node IDs). |
| AI Copilot | Open the Simone AI assistant panel (if enabled for your account). |
| Versions | Open the version history drawer. |
| Generate documentation | Auto-generate business or technical documentation for the current workflow. |
Working with Nodes
Adding Nodes
There are several ways to add nodes:- Toolbar — Use the bottom toolbar buttons to add channels, data nodes, or outputs.
- Context menu — Right-click on the canvas or on an existing node for contextual actions.
- Drag and drop — Drag node types from the picker drawers onto the canvas.
Connecting Nodes
Nodes have connection handles (small circles on their edges). To connect two nodes:- Click and drag from a handle on one node.
- Drop on the handle of another node.
- An edge (arrow) appears connecting them.
Configuring Nodes
Click on any node to open its configuration drawer on the right side of the canvas. The configuration options vary depending on the node type — see the dedicated pages for channels, data nodes, logic nodes, and output nodes.Context Menu Actions
Right-click on a node to access:- Edit — Open the configuration drawer.
- Duplicate — Create a copy of the node.
- Delete — Remove the node and its connections.
- Add documentation — Attach a documentation note to the node.
- Create branches — Add a logic node downstream.
- Use data — Add a data node downstream.
- Add content — Add an output node downstream.
- Delete — Remove the connection between two nodes.
- Qualify branch — Assign a branch category to this path.
Publishing a Workflow
Before a workflow can serve content, it must be published:Automatic validation
The system validates the workflow for common errors:
- Missing channels
- Missing outputs
- Circular dependencies
- Invalid node configurations
- Content bindings errors